Message Centre.
Get support for your Esendex Message Centre products.
Contacts and Groups
There are a number of ways to add new contacts to your account.
If you only have a few new contacts, you can add them manually. If you have many to add, you can import them in bulk.
Both contacts and groups can be added to a send via the message centre or after you’ve started a conversation.
Manually adding new contacts
Once you’ve logged into the portal, select ‘contact & groups’ from the left-hand panel. A list of current contacts will then be shown.

To add a new contact, click the ‘create contact’ button and fill in all the contact’s information.
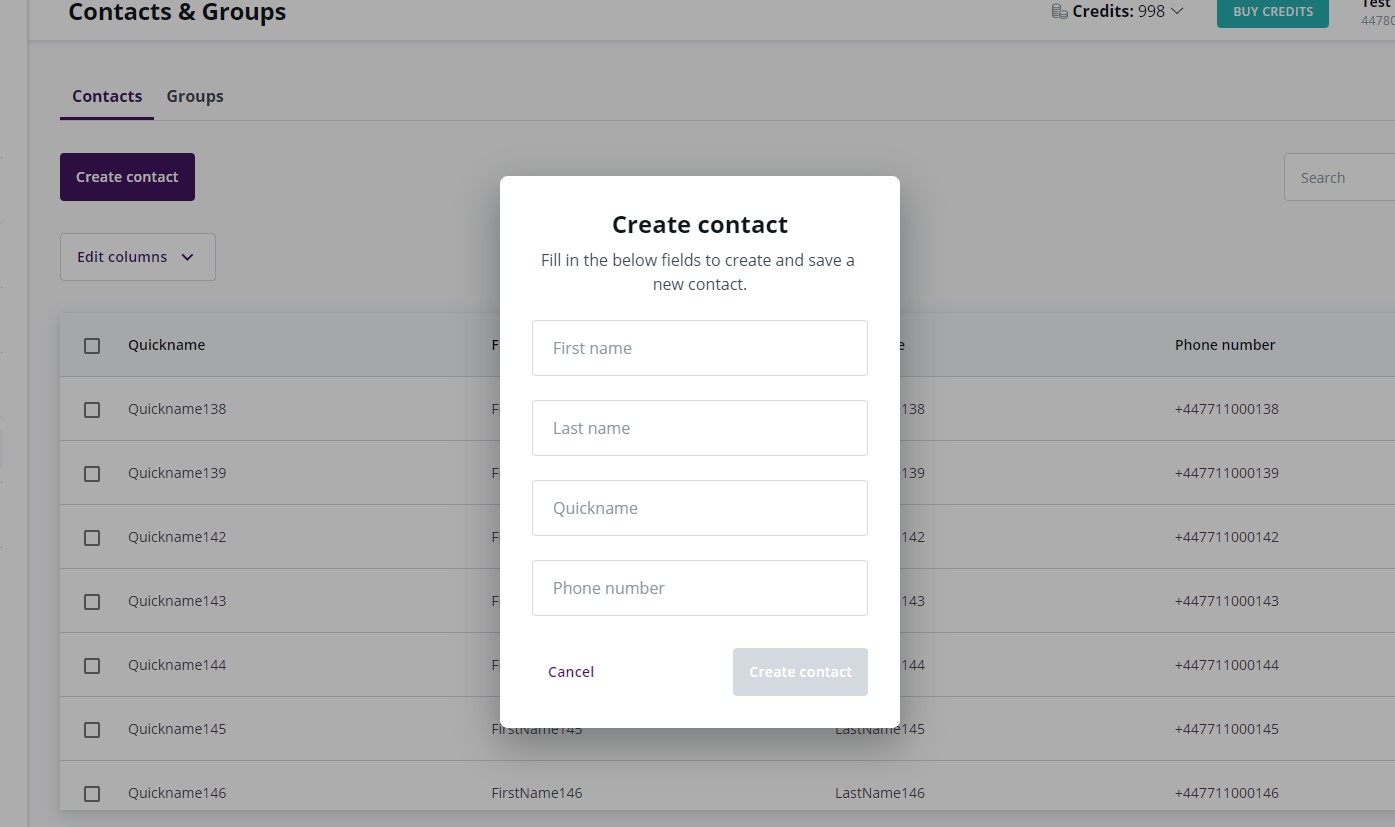
When you fill in the first and last name, a quickname will automatically be filled in for you, but you can change it by simply typing in a new one.
Contact phone numbers can be up to 15 digits, not including the country code. If a + is not included at the start of the number, one will be added. For example, 447716123456 will become +447716123456.
Uploaded numbers which have a 0 at the start will automatically be amended to the code of the country your account is set up for.
If a contact with the same phone number already exists in your account, a message in red will appear beneath the phone number and you’ll be unable to add them to your list as a duplicate contact.
If the number being added is invalid (for example, if it has too many digits) you’ll also be unable to add it. You’ll get a message beneath the phone number telling you it’s invalid.
Once you’ve filled in all the information, you can click the ‘create contact’ button and you’ll be taken back to your list of contacts.
Importing contacts in bulk
If you want to add a large number of contacts, the quickest way is a bulk import. This can be done easily by uploading a file containing the contacts. After selecting the appropriate column, these contacts will then be added to your list. You can upload up to 200,000 contacts using a spreadsheet or address book.
Contact phone numbers can be up to 15 digits, not including the country code. If a + is not included at the start of the number, one will be added. For example, 447716123456 will become +447716123456.
Uploaded numbers which have a 0 at the start will automatically be amended to the code of the country your account is set up for.
Deleting a contact or group
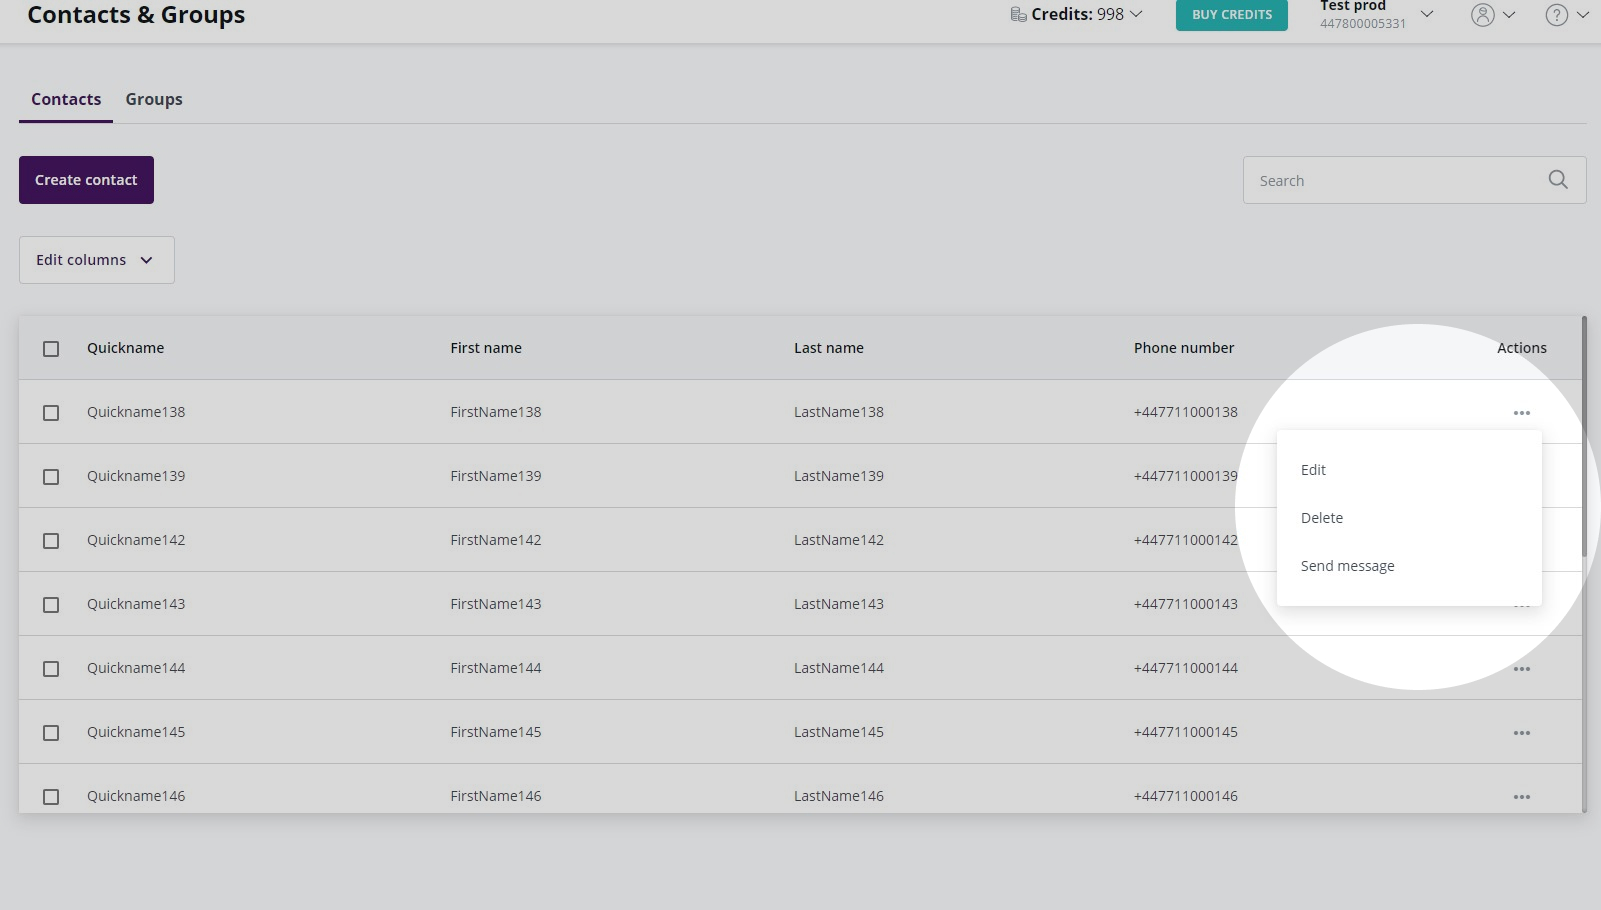
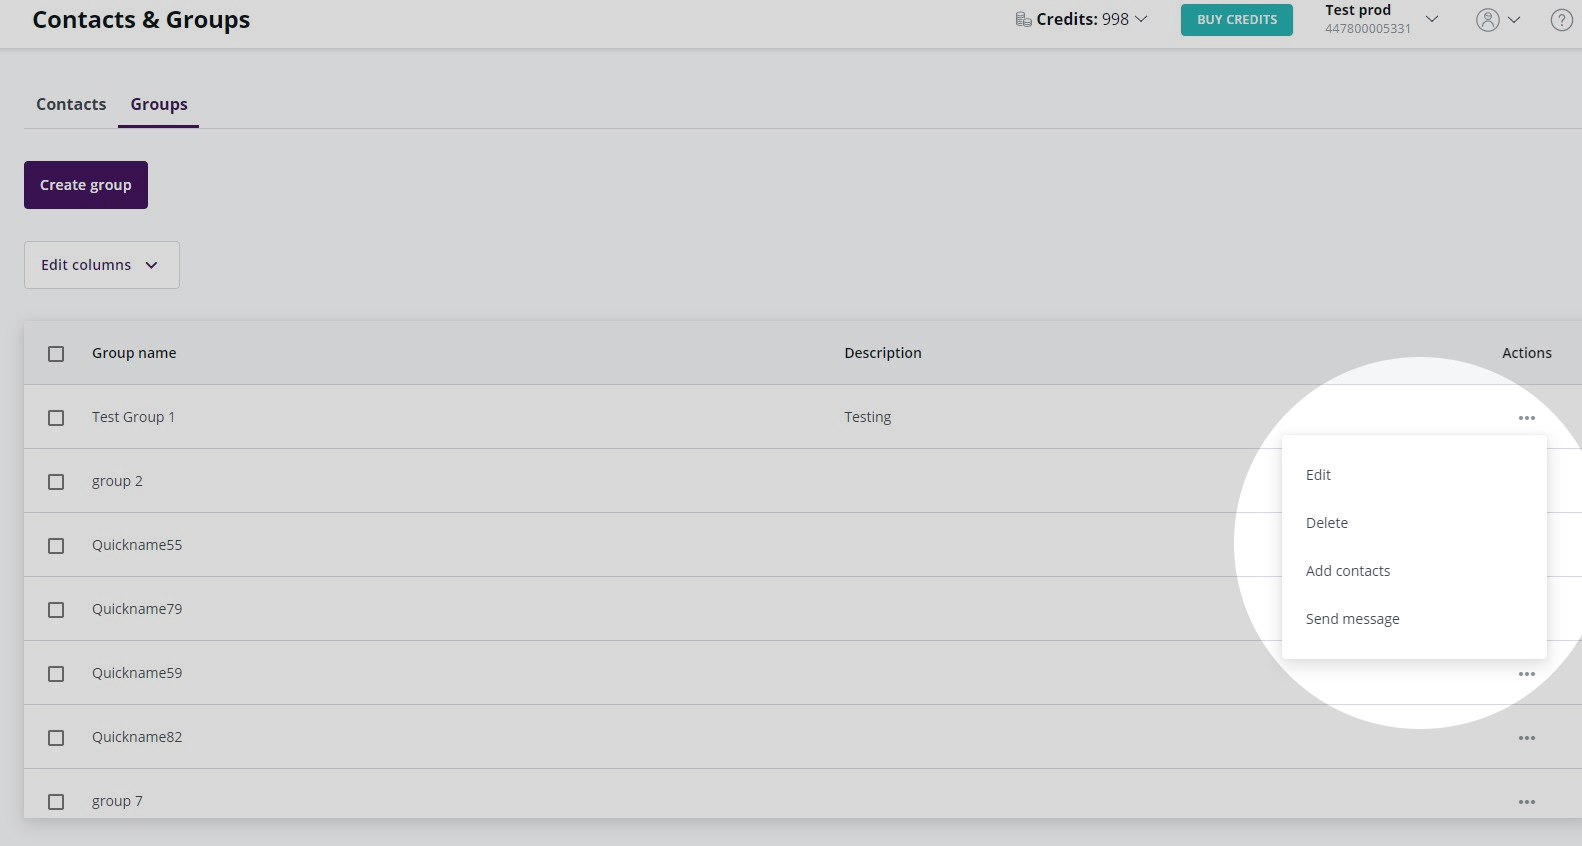
To delete a contact or group, click the three dots under the action column and select ‘delete’ from the options.
Creating groups of contacts
If you want a subset of your contacts to receive a particular message, you can create a group for them.
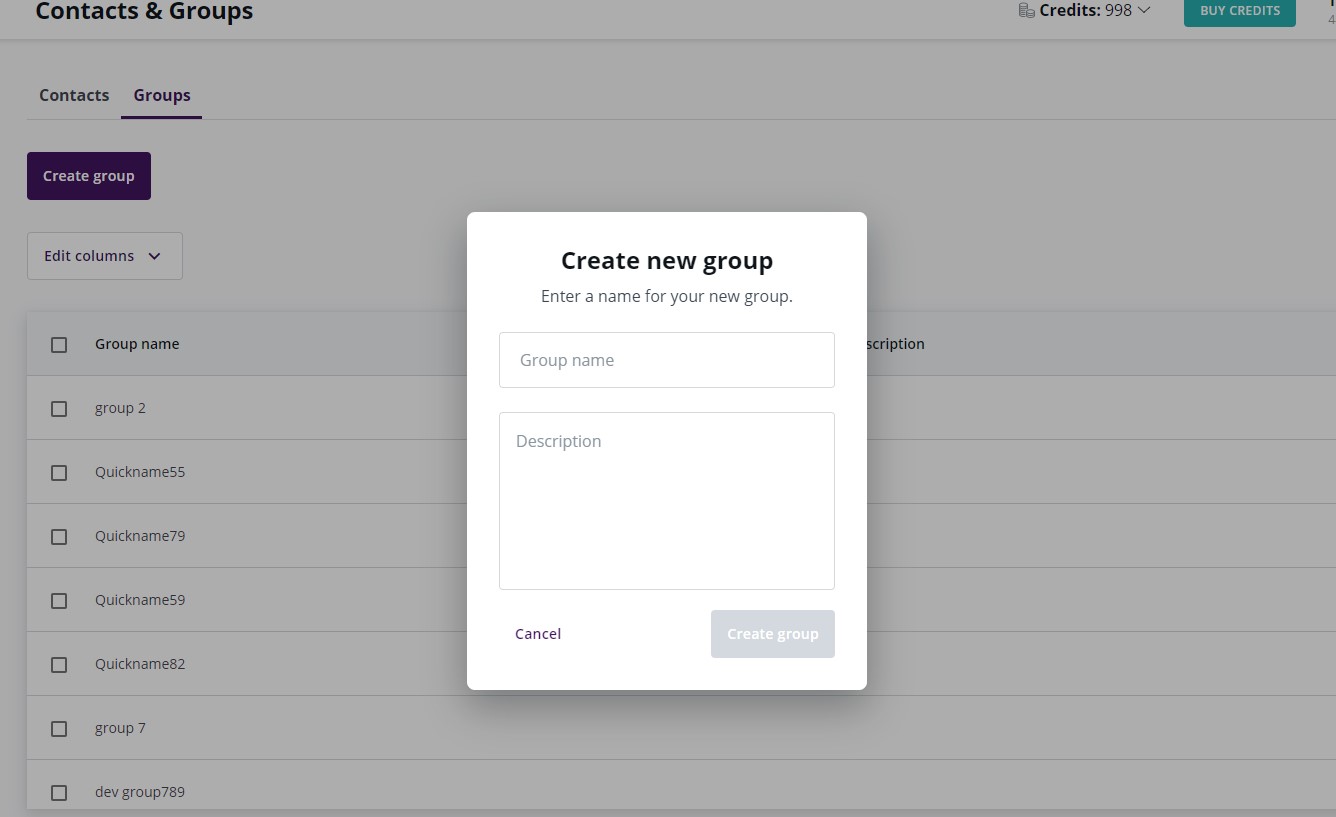
To do so, click on ‘contacts & groups’ in the left-hand panel then select the ‘groups’ tab and click on ‘create group’.
You then need to give the group a name. You can add a description too, but this is optional.
Once you’ve named the group, you can begin to add contacts to it by clicking the three dots in the action column. This will bring up the option to add contacts.
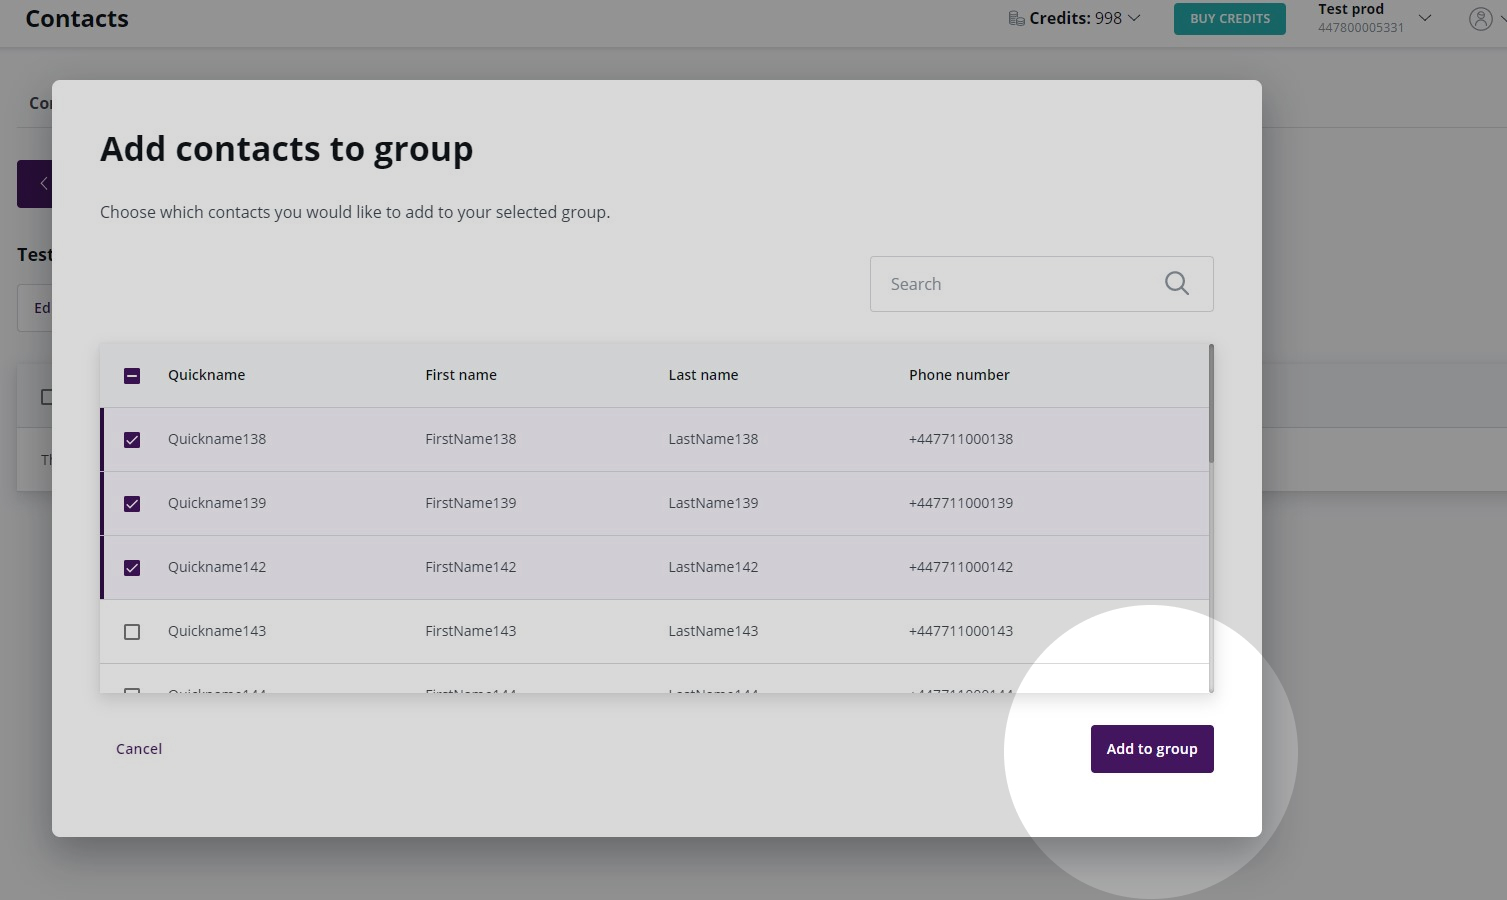
Click this and you’ll be taken to a screen where you’ll see all existing contacts for the account you’re working on.
You can then search for a particular contact you want to add to the group and tick the box next to their name.
Or, you can go through the list and tick the box next to multiple contacts you may want to add to the group.
Once you’ve done this, select ‘add to group’.
Sending a message
You have the option to go to your list of contacts and select a specific person you want to message.
Or you can go to your list of groups and select who you want to message from there.
Start by clicking the three dots in the ‘action’ column next to the contact or group of contacts you want to send a message to.
You’ll then see a list of options appear.
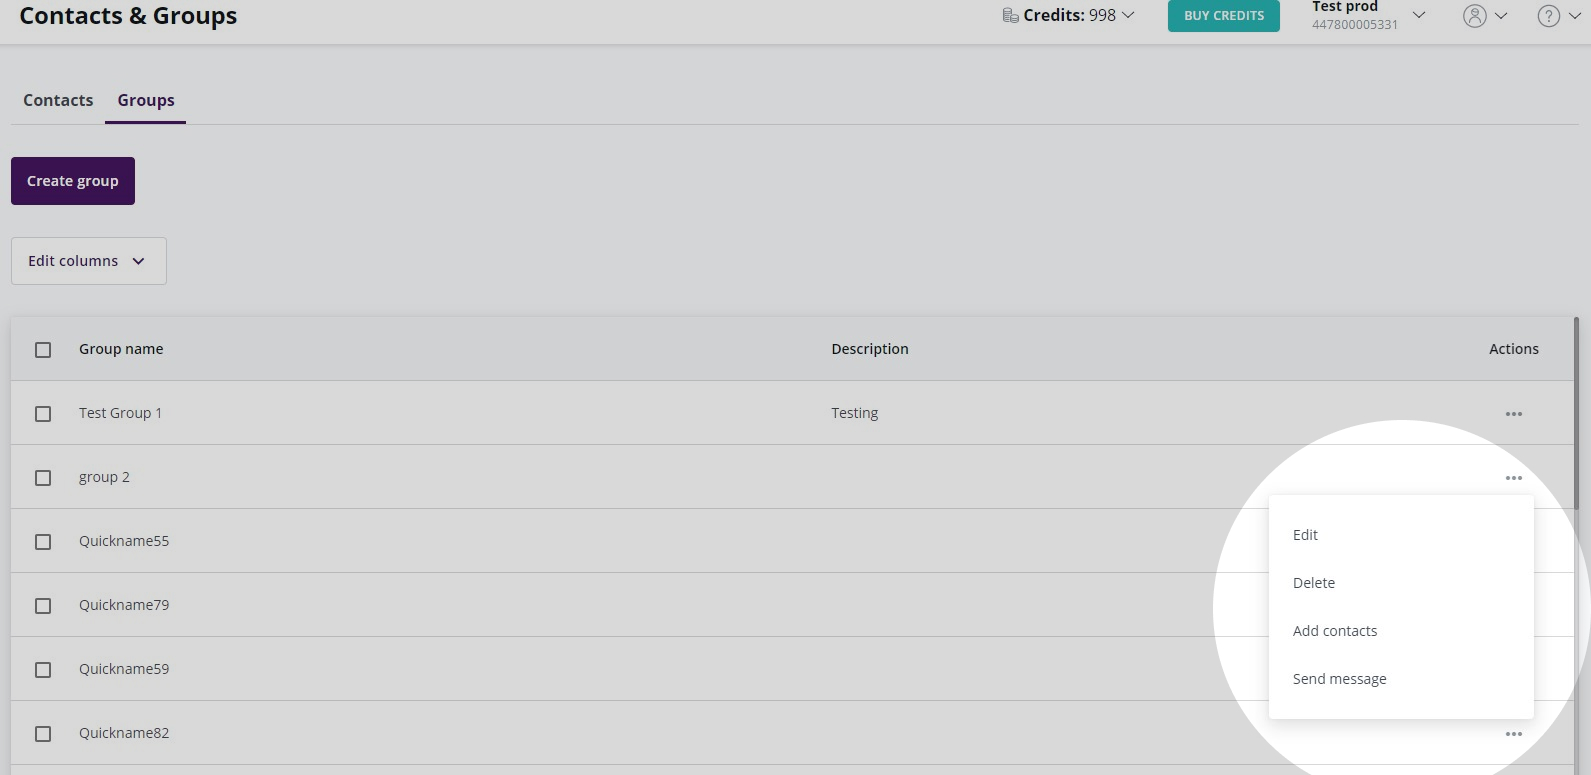
Choose the ‘send message’ option which will take you to a page where your contacts or group will already have been added to the message.
Please refer to our guide on How to Build and Send an SMS Message for details of this process.
Editing a contact’s information
To edit an existing contact, click the three dots in the ‘action’ column next to the contact. Then choose the edit option. Once you are happy with the changes you have made, click ‘save contact’.
Opt outs
If a recipient opts out by replying ‘STOP’ to a message sent to their number, you’ll no longer be able to message them from the account they replied to. But they can still be messaged from other accounts.
You can download a file with all numbers who have opted out under the ‘opt out’ tab in the ‘contact & groups’ section.
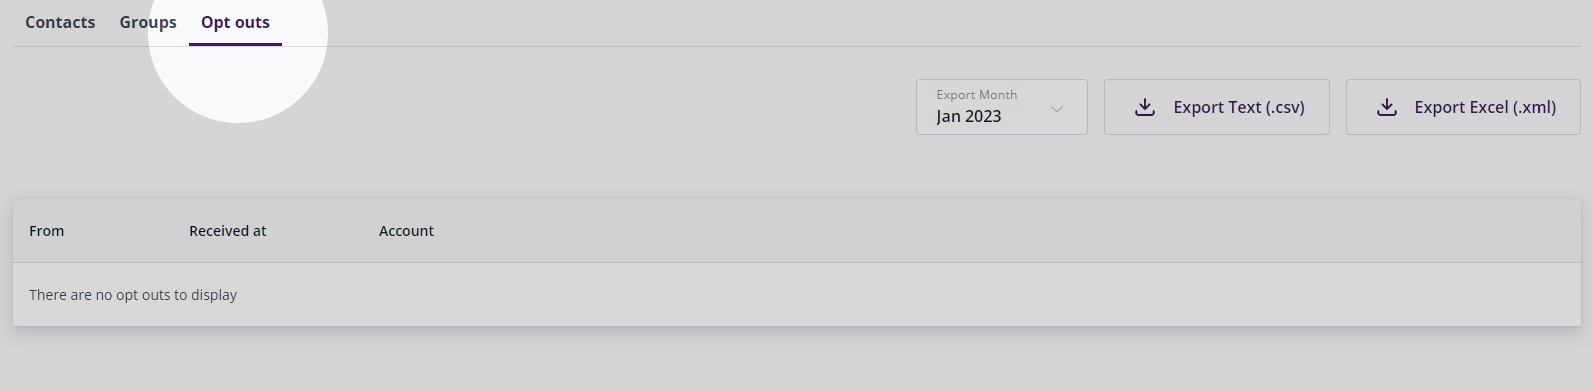
You can then use this file to exclude them from specific messages. Or you can update their GDPR preferences on your core Customer Management System to stop messaging them from all your accounts.
Recommended articles
Can't find what you're looking for?
Speak to a member of our support team.