Message Centre.
Get support for your Esendex Message Centre products.
How to Build and Send an SMS Message
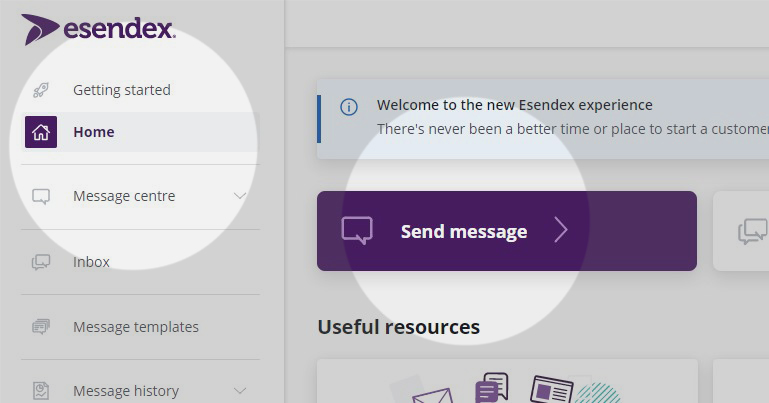
There are three different ways to start building and sending your SMS messages. For a step-by-step guide, you can request help from our interactive Wizard, which is located under the ‘getting started’ tab on the left-hand side of the portal. You can also use the quick link tab called ‘send message’ or head over to the ‘message centre’ on the left-hand side of the portal.
Naming your campaign
First things first, add an appropriate campaign name to your send title box. Recipients won’t have access to the campaign name as the message title tag can only be viewed by you.
Adding your recipient(s)
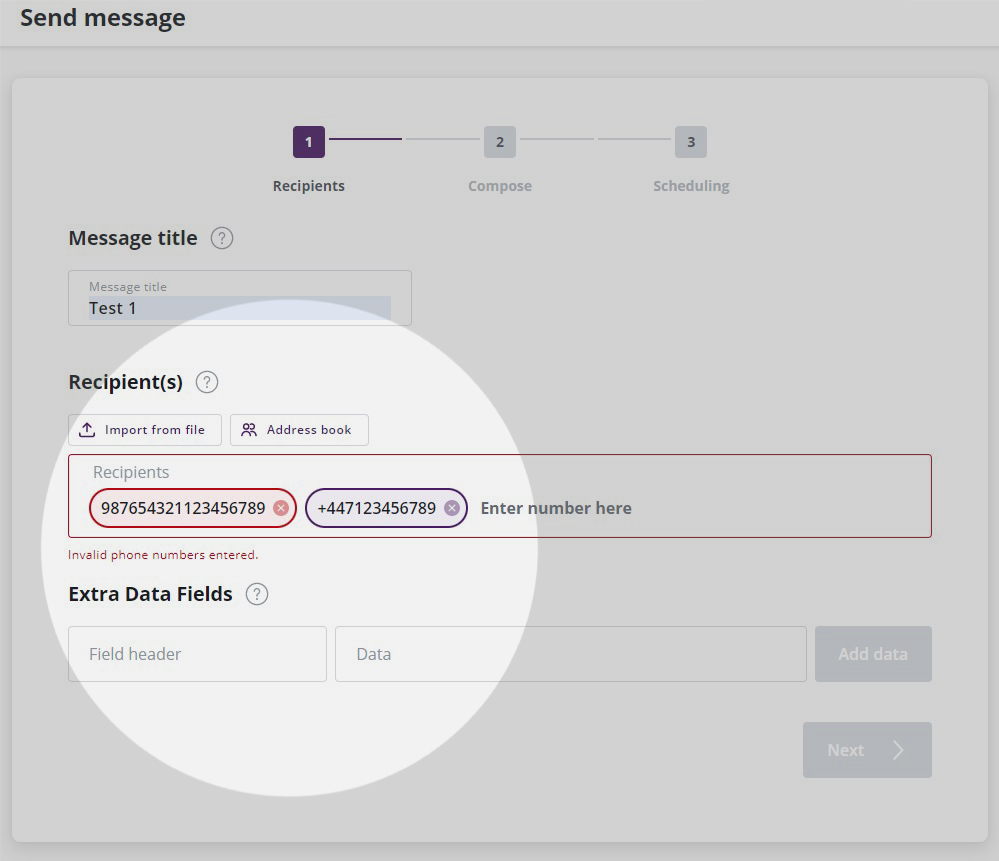
To send an SMS message successfully, you’ll need to add the phone number(s) of your recipient(s). All recipient phone numbers should start with an international number code. However, if no country code has been added, our platform will automatically format the number to add a UK country code +44.
Once a valid number has been added, the digits will appear highlighted in a purple circle. To help with number validation, duplicate numbers will be highlighted in yellow and invalid numbers will be flagged in red.
For additional support, see our detailed guide regarding recipients. Under this section, you will also have the option to add extra data fields which can help create a dynamic message.
Adding sender name
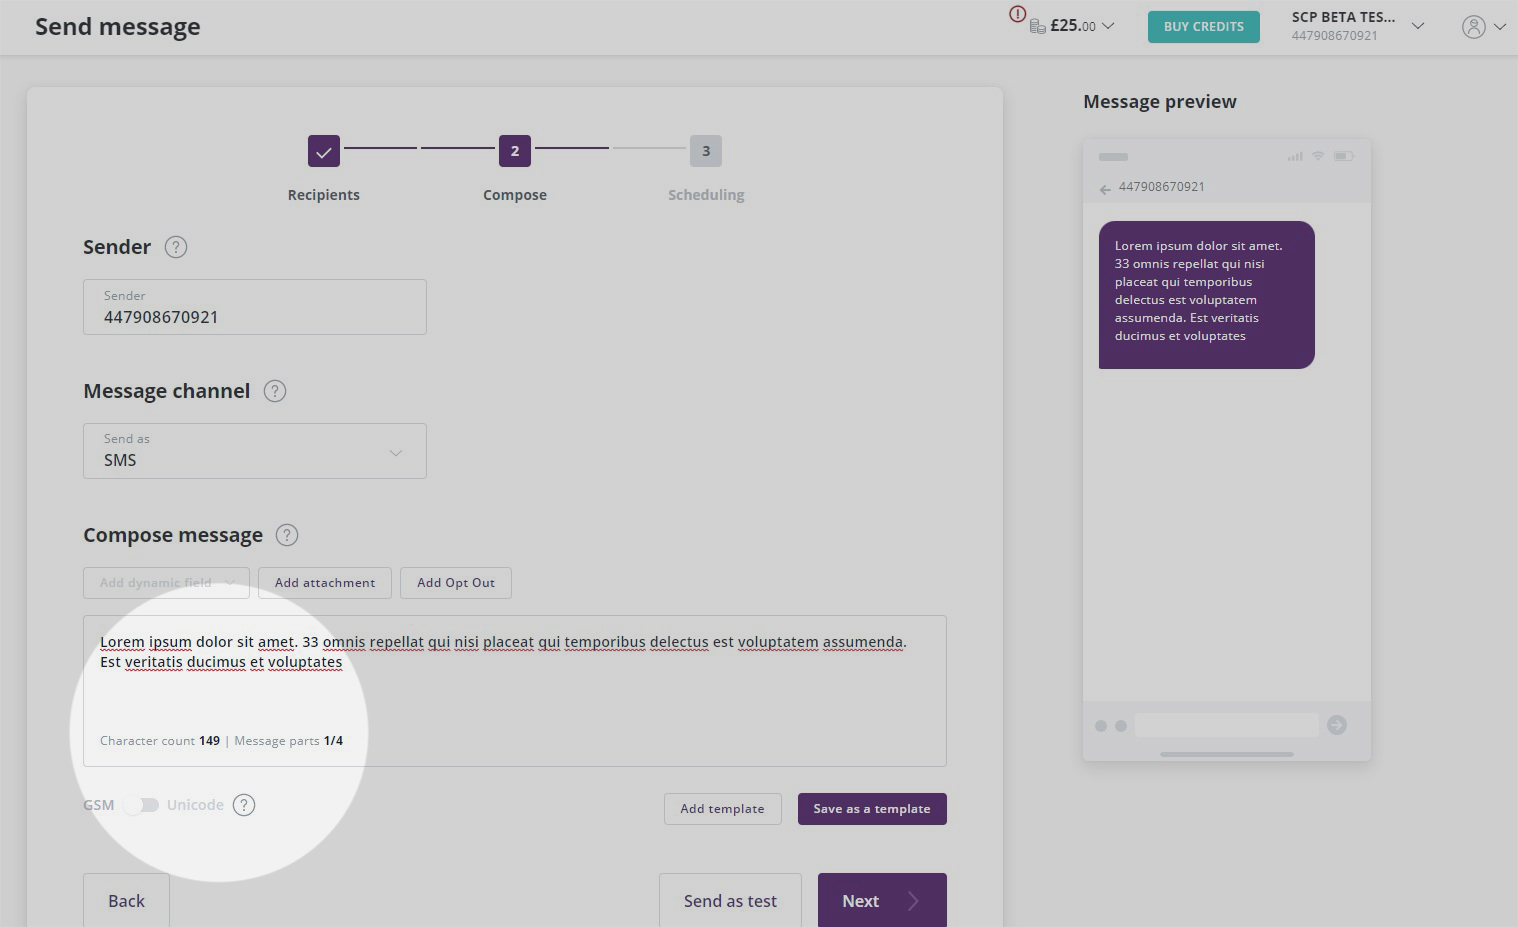
After adding your recipient(s), press ‘next’ to move on to the ‘compose message’ tab. Under the sender section, you’ll need to specify what name or number you want recipients to see when they receive your SMS. This can be a short code number, virtual mobile number, or name (up to 11 characters long).
Choosing a message channel
You’ll also need to choose your message channel, which in this case is SMS. If you would like to benefit from a more enriched channel of communication, you can upgrade to our RCS or WhatsApp messaging services.
Creating your message
Next, it’s finally time to compose your message. As you type your text, you’ll notice the character count at the bottom of the text box increases. A single text message is 160 characters, once this number is exceeded it becomes more than one message part. To send more than one message part, the network uses 7 characters to truncate the message and join the different message parts, meaning every message part is 153 characters to a maximum of 612 characters.
It is worth being aware that some characters, such as the Euro symbol, are actually worth two characters, and that if you add a carriage return or line break this is a character too.
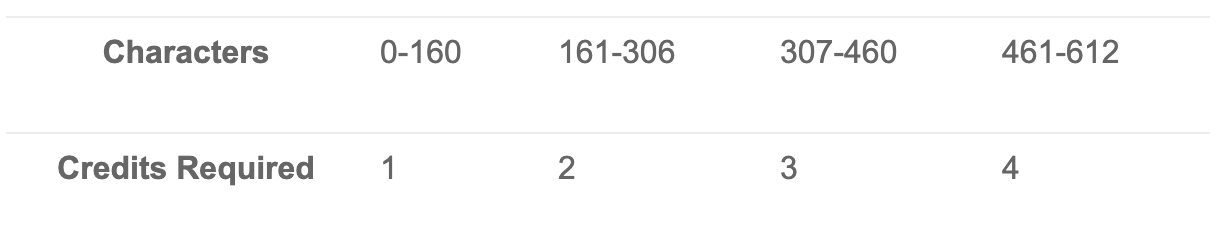
You can keep count of how many message parts your text is composed of at the bottom of the text box. This is an important figure to watch out for as we charge by message part, not by the number of characters. For each message part you send, you will be charged one credit. If your message contains anything other than Latin characters, digits, or a few special symbols, your message will be automatically toggled from GSM to Unicode.
Saving your message as a template
If you would like to save your message for future use, you have the option to save it as a template. Simply click the ‘save as a template’ button below the text box and add a name to reference it in the future. To learn more about templates, see our detailed guide.
Previewing your message
As you create your SMS, you will see it appear on the message preview window, located on the right-hand side of your screen. If you would like to conduct a more realistic test of your SMS campaign, you can send a single trial run to a personal phone number by pressing the ‘send as test button’ at the bottom of the page.
Scheduling your message
Once you’re happy with the content of your message, it’s time to schedule when you would like your SMS to be received. You can either send the text immediately or specify a future time and date for your campaign. Please note that you should always schedule your text message more than 15 minutes in advance. It’s important to note that credits will be taken at the time of scheduling rather than the time you send the message.
Report Data Expiry
In the final section, you also have the option to determine how long we should hold onto your data message reports. Use the calendar to set a report expiry date and time. After your selected date, you will no longer be able to view or download the message report data. Not only this, but once your data has expired, we will no longer be able to retrieve this information.
Campaign summary
After you’ve signed off on the details of your SMS campaign, click the ‘send message’ button and take a look at a brief summary of your campaign. Here, you’ll see how many recipients your message was sent to, how many credits the campaign cost, the details of your scheduling, and when the report data will expire.
Recommended articles
Can't find what you're looking for?
Speak to a member of our support team.