Message Centre.
Get support for your Esendex Message Centre products.
Sending Dynamic Messages
Uploading recipients to a dynamic message
Once you import your CSV or Excel file and select the “dynamic to all” message option, you can drag and drop your file into the portal or upload the document directly from your computer.
To successfully create a dynamic message, you will need to specify in which column the recipient’s phone number is located and confirm that the uploaded file contains headings.
After completing these steps, press ‘upload recipients’. The system will then notify you of the total valid and invalid phone numbers. Once you are satisfied with the results, press ‘use recipients’.
Creating your dynamic message
With “dynamic to all” file uploaded
Under the ‘compose’ tab, you must specify the name or number you want recipients to see when they receive your SMS. This can be a short code number, virtual mobile number, or name. Similarly, you will need to pick a message channel, which in this case is SMS.
To create a personalised SMS campaign with customer data, type out your message and press the ‘add dynamic field’ button above the text box. You will then have a list of category options to choose from that will personalise your message.
If you would like to personalise your text messages with the recipient’s name and the delivery date, you could create an SMS with two dynamic fields. For example,
“Hi [[first name]], thank you for your delivery. Your order will arrive on [[delivery date]]”.
The dynamic field prompt will be replaced with your customer’s individual data as per the information found in the uploaded spreadsheet. You may want to use this message regularly; in which case you can save the text as a template. See our detailed guide to learn more about templates.
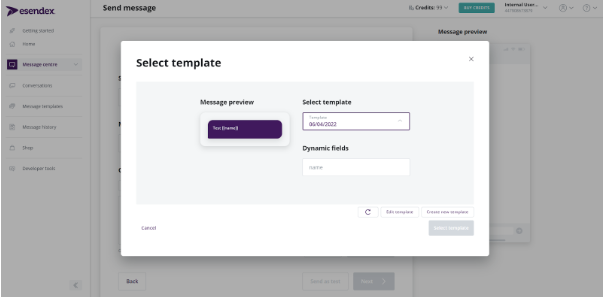
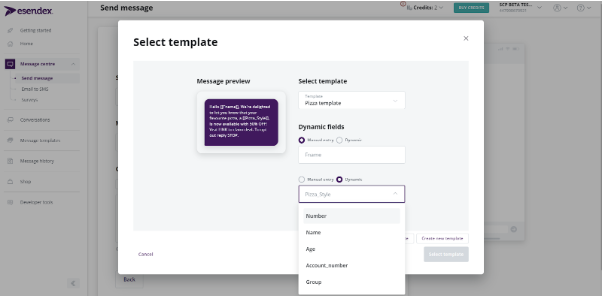
Using a template with dynamic fields
On the ‘compose’ message tab, you can select a template with dynamic fields. Upon selection, you will be required to fill out the dynamic fields.
If you select a dynamic template and you have not completed a “dynamic to all” upload, then you can manually enter the dynamic field, which will be the same for all messages sent to the customer.
If you have a “dynamic to all” file uploaded, then you can choose to manually input the dynamic field so this will be the same for all messages or you can choose from the dropdown of file headers to select personalised fields. You can choose between manual or dynamic by selecting them.
Recommended articles
Can't find what you're looking for?
Speak to a member of our support team.